REVIEW · PORT CHALMERS
Iconic Shore Excursion: Dunedin City Highlights Tour
Book on Viator →Operated by Iconic Tours NZ Ltd · Bookable on Viator
Signal Hill gives Dunedin a second skyline. This half-day tour strings together the big-name places—Baldwin Street, Otago Harbour lookouts, and classic student-city stops—plus enough breathing room to actually enjoy the moments.
I especially like the small-group size (max 20), which keeps the day from feeling like a conveyor belt. And I really value the pickup-and-drop-off convenience for cruise days and train-station arrivals, so you spend less time figuring out logistics and more time looking up at the hills.
One thing to consider: the schedule is tight, with many short stops, and there’s no lunch included, so you’ll want to plan food timing (and bring a snack if you get hungry). Also, getting on and off uses steps, so you need to be able to manage that unassisted.
In This Review
- Key Things That Make This Dunedin Tour Worth Your Time
- First Stop: Signal Hill Views and the Quick Edinburgh Connection
- Baldwin Street: The Main Event (Yes, It’s Really That Steep)
- University of Otago: Student Culture Without the Long Campus Detour
- Olveston Historic Home Gardens: A Beautiful Break, With One Ticket Caveat
- The Octagon: Your One-Hour Block of Freedom in the City Center
- Dunedin Railways Station: Architecture and Early-20th-Century Glam
- Toitu Otago Settlers Museum: People, Place, and Why Dunedin Feels Local
- Speights Brewery: Beer History Without the Time Sink
- St Clair Beach If Time Permits: A Photo Stop for Coastal Dunedin
- Guide Impact: What Makes This Tour Feel Personal
- Price and Value: Is $61.44 a Good Deal?
- Timing Tips for a Smooth, Photo-Friendly Day
- Who This Tour Fits Best
- Should You Book Dunedin City Highlights?
- FAQ
- How long is the Dunedin City Highlights Tour?
- Where do I meet the tour in Port Chalmers?
- What are the main stops on the itinerary?
- Is there free time to explore on your own?
- Is lunch included?
- Is the tour suitable for kids and for travelers with mobility limits?
Key Things That Make This Dunedin Tour Worth Your Time

- Signal Hill first: high viewpoints early, when light and timing are often best
- Baldwin Street time built in: not just a drive-by; you get a real chance to walk or pose
- A full hour in the Octagon: Dunedin’s central square for shops, cafés, and photos
- Historic + modern Dunedin in one run: Otago heritage, the university, and beer history at Speights
- Toitu and the rail station: museum and architecture stops without dragging the day out
- Most stops are free admissions: you’ll avoid surprise ticket costs on several key sights
First Stop: Signal Hill Views and the Quick Edinburgh Connection
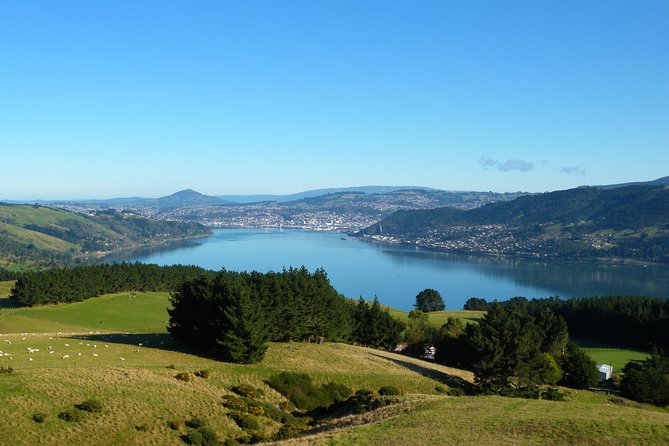
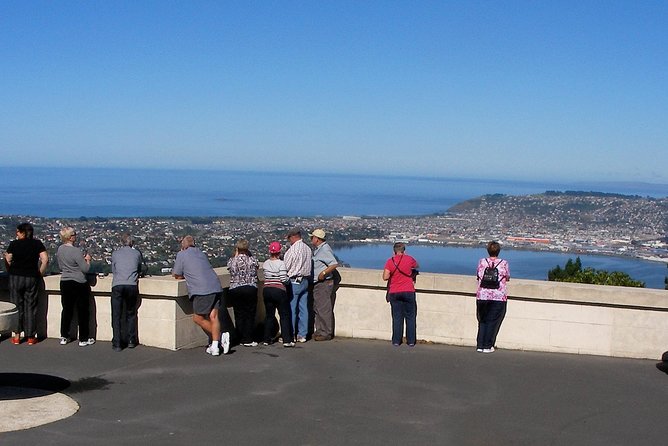
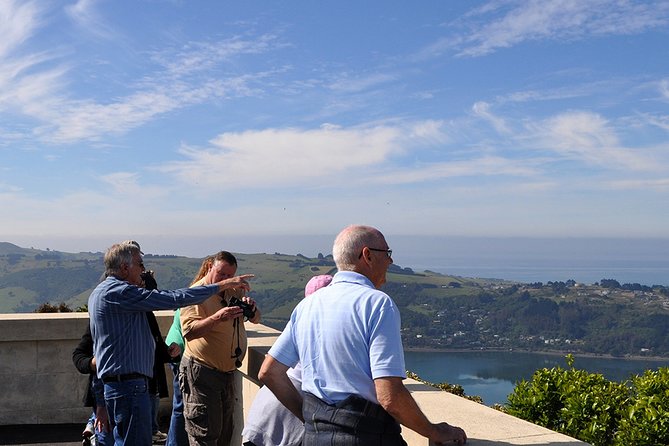
The day kicks off at Signal Hill, about a 15-minute stop built around viewpoint time. This is one of those places where Dunedin feels bigger than you expected. You look down over the city, across Otago Harbour, and out toward the surrounding hills—good for photos, good for orientation, and good for getting your bearings fast.
The tour also calls out a fun connection to Edinburgh, Scotland, based on what you can spot if you know what to look for. Even if you do not, you still get the value: a high, open vantage point that makes the rest of the route make sense. After this, the city streets feel like they’re dropping you into a story instead of just passing by landmarks.
If the weather is clear, Signal Hill is a strong early win. If it’s windy or foggy, you’ll still benefit from the viewpoint being scheduled early—later stops can become a bit more unpredictable when time is running.
You can also read our reviews of more city tours in Port Chalmers


Baldwin Street: The Main Event (Yes, It’s Really That Steep)
Next comes the star attraction: Baldwin Street, famous as the world’s steepest street. You get around 30 minutes, which is just enough to do the basics well. If you want to walk partway or sprint to the top for bragging rights, you can. If you’d rather take photos and people-watch, that works too.
Here’s the practical part: bring shoes with decent grip. The street is steep enough that a quick look becomes a mini cardio session. Also, plan your photos—crowds and angles change fast once people start moving.
One more detail I like about this stop: the tour doesn’t treat Baldwin Street like a drive-by checkpoint. You actually have time to enjoy it. That matters because Dunedin’s charm is partly in these small, weird, very real things you can only appreciate by standing there.
University of Otago: Student Culture Without the Long Campus Detour

After Baldwin Street, the tour swings by the University of Otago. The stop is short—about 5 minutes—so think of it as a photo-and-context moment, not a campus tour.
Why it’s still worth it: Dunedin’s identity is tied to students, and the university is central to that vibe. Even a quick stop helps you connect what you’re seeing on the streets to why this city feels the way it does—busy in pockets, lively near the center, and full of local culture.
If you were hoping for a deep campus walk, this stop won’t fully satisfy that. But for cruise days or first-time visits where you’re trading time for highlights, it’s a sensible balance.
Olveston Historic Home Gardens: A Beautiful Break, With One Ticket Caveat
The tour includes a visit to the Olveston Historic Home gardens for about 15 minutes. The gardens are noted as free to enter, but the Olveston admission is not included in the tour’s cost. So you might enjoy the garden setting without paying extra, but if you want to go further inside, you’ll need to plan for that.
This stop is a nice contrast to the steep street and city viewpoints. It adds a calmer tone and gives you a bit of greenery and architecture without turning into a long detour. If you’re the type who likes to see how wealth and taste looked in an earlier era, Olveston is a worthwhile add.
The caution: because time is limited, you’ll feel the difference between a garden glance and a slow wander. If you’re deciding whether to spend extra money on indoor areas, look at your priorities first—photos and gardens may be enough for many people.
The Octagon: Your One-Hour Block of Freedom in the City Center
Then you get a gift: about 1 hour of free time in the Octagon, Dunedin’s city-center hub. This is where the day becomes yours. You can browse shops, grab coffee, or just sit and watch the flow of the city.
The Octagon also works as a practical hub for planning your own mini-moments. If you want souvenirs, a quick café pause, or photos with historic buildings in the background, this is the slot that makes it possible. It’s also where people often choose to do lunch on their own since lunch isn’t included on the tour.
If you’re trying to beat the clock on a cruise day, this is the moment to be strategic. Pick your food spot early, or at least have a plan for where you want to be when your tour return time approaches. The hour is generous compared to the shorter sight stops, and it’s one of the best uses of time on the whole route.
A few more Port Chalmers tours and experiences worth a look





Dunedin Railways Station: Architecture and Early-20th-Century Glam
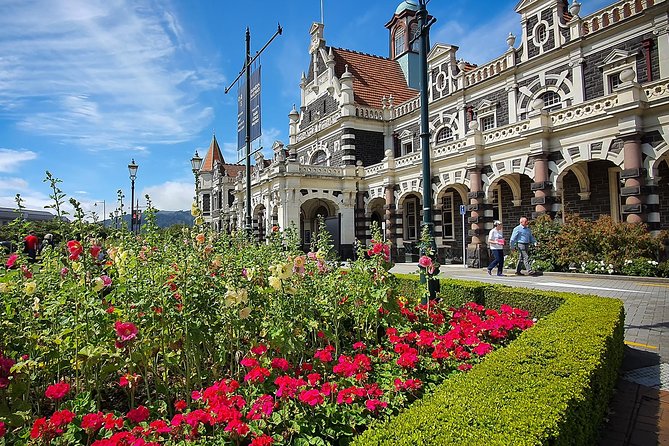
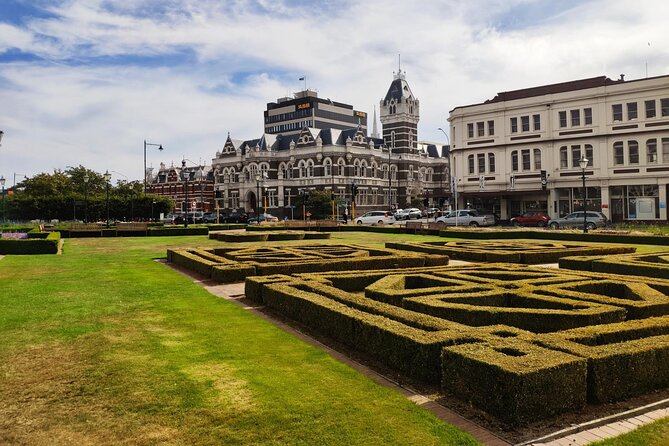
A highlight for many first-time visitors is Dunedin Railways, the grand station. You’ll spend about 20 minutes, which includes time to view the building from the gardens and to see the interior.
Even if you’re not a trains person, the station is a classic Dunedin “how did this city get so grand?” stop. It captures the city’s earlier prosperity and gives you a strong sense of scale. The best part is timing: you see it before your energy drops, and you have enough minutes to do photos without rushing through.
This is also a stop that works well in mixed weather. If it’s not great outside, you can still get your fix inside, and the station’s look changes depending on where the light hits.
Toitu Otago Settlers Museum: People, Place, and Why Dunedin Feels Local
Next on the schedule: Toitu Otago Settlers Museum for about 20 minutes, described as one of New Zealand’s top museums. The tour’s focus here is quick context—enough to connect the dots between the city you’re touring and the stories that shaped it.
If you like museums that explain rather than just display, you’ll probably enjoy this stop. The museum is framed as an overview of Dunedin’s people and achievements, including local Maori history, with lots of artifacts meant to tell the story of how the region developed.
The trade-off is obvious: you won’t see everything. But for a half-day excursion, it’s a smart use of time. It gives your sightseeing stops more meaning, which is often what makes a short tour feel worth it.
Speights Brewery: Beer History Without the Time Sink
The tour adds a quick visit connected to Speights Brewery, noting it has been making beer since 1876, and that it’s the oldest working brewery in New Zealand. Expect a short stop—enough for a look and typically time to check out the gift shop.
Why I like this kind of stop: it turns one city icon into a tangible local story. Beer culture is part of Dunedin’s day-to-day character, not just a souvenir idea. And because it’s short, you don’t lose your momentum.
If you’re sensitive to time pacing, keep in mind this is not a full tasting session; it’s a quick landmark stop that fits the half-day format.
St Clair Beach If Time Permits: A Photo Stop for Coastal Dunedin
If there’s time, the route may include a brief drive-past and photo stop at St Clair, a popular Dunedin city beach. You’ll likely see surfers from the road and get a moment to grab a few images of the coastline.
This is the kind of add-on that works best when you already like the view-and-walk rhythm of Dunedin. If you’re short on energy, it might feel optional rather than essential. But it’s a good final touch because it adds a coastal note to a day that starts with hills.
Guide Impact: What Makes This Tour Feel Personal
The guides are a big reason this tour earns such strong scores. In the past, I’ve seen names like Kim, Greg, Allan, Ken, and Ann tied to great experiences, and the pattern is clear: the guides mix facts with local color and keep the stops moving so you actually see the highlights.
One practical benefit: guides tend to position the bus so you can walk shorter distances between stops. That matters in Dunedin, where sidewalks and parking can vary block to block.
Also, there’s an attitude shift that you’ll feel during the ride. Several people describe guides as friendly and enthusiastic, and that energy often turns what could be a checklist trip into a narrative. You’re not just visiting places—you’re getting the “why this matters” behind them, in a way that sticks.
That said, not every day will feel perfectly smooth. There’s an occasional risk of timing hiccups, and some people have had issues with bathroom pacing or the way a stop time was handled. The safest approach? Assume you’ll need to manage your own comfort: use facilities when you can, and be ready for a slightly fast rhythm. The tour’s format is designed for limited time, especially on cruise schedules.
Price and Value: Is $61.44 a Good Deal?
At $61.44 per person for roughly 4 hours, this tour often makes financial sense for three reasons.
First, you’re paying for local guiding plus transportation plus cruise or station pickup/drop-off. For cruise passengers, that “getting you there and back” value can be the whole point. Second, many major stops are free admissions on the itinerary (viewpoints, Baldwin Street, Octagon, and several museums/stations are noted as free in the schedule). Third, the small-group limit of 20 people helps you feel like you’re not lost in a crowd.
What you should budget separately: lunch and possibly Olveston if you want indoor access. If you handle food on your own and you only do the free parts where tickets aren’t included, you’ll usually keep your total spend reasonable.
If you want a slow, deep-dive Dunedin day with long walks and unhurried museum time, you’ll probably prefer a different style of tour. But if you want the highlights without spending a full day planning, this one’s strong value.
Timing Tips for a Smooth, Photo-Friendly Day
Because the day mixes viewpoints, quick landmark stops, and one longer downtown window, your small decisions help a lot.
- Wear shoes you can walk in on hills. Baldwin Street is the one that bites.
- Bring a light layer. Signal Hill can feel cooler and windier than the city center.
- Plan for a snack. Lunch isn’t included, and the Octagon is the main freedom slot.
- If you’re sensitive to tight schedules, be proactive about using facilities early rather than waiting for the next stop.
Also, since it’s a mobile ticket experience, make sure your phone battery is healthy and your ticket is ready before you reach the meeting point.
Who This Tour Fits Best
This excursion is ideal if you:
- Are doing a cruise day from Port Chalmers and want Dunedin highlights without figuring out transit
- Prefer a small-group experience where you can get answers on the spot
- Want a fast overview that still includes both architecture and culture (rail station, museum, historic home gardens)
- Like the mix of photo stops and one real chunk of downtown time in the Octagon
If you want a long university campus visit, hours in one museum, or a slow beach stroll, this route may feel too compact. But for first-time orientation and highlight collecting, it’s well matched to the time you’re given.
Should You Book Dunedin City Highlights?
I’d book this tour if your priority is seeing the big Dunedin moments in one half-day: Signal Hill, Baldwin Street, the Octagon, and the city’s signature culture stops. The strong rating and the focus on actually getting you off the bus and into key sights make it a smart use of limited time.
I’d think twice if you hate tight timing or you rely on frequent bathroom breaks. The itinerary is designed around efficiency, so you’ll enjoy it most if you’re comfortable moving between short stops and then using the Octagon hour for food and wandering.
If you’re deciding between doing nothing or building a simple plan, this is the kind of tour that gives you a Dunedin “greatest hits” day without turning it into a stressful race.
FAQ
How long is the Dunedin City Highlights Tour?
It runs for about 4 hours (half-day) and is designed to fit well into cruise or short visit schedules.
Where do I meet the tour in Port Chalmers?
For cruise ship guests, you meet inside the Visitor Building on the ship’s wharf for pickup and drop-off.
What are the main stops on the itinerary?
You’ll see Signal Hill, Baldwin Street, the University of Otago, Olveston Historic Home gardens, the Octagon, Dunedin Railways, and Toitu Otago Settlers Museum, with a possible additional photo stop at St Clair if time permits.
Is there free time to explore on your own?
Yes. The tour includes about 1 hour of free time in the Octagon, Dunedin’s city center.
Is lunch included?
No. Lunch isn’t included.
Is the tour suitable for kids and for travelers with mobility limits?
Children must be accompanied by an adult. The tour notes that passengers must be able to access the vehicle steps on and off unassisted. Service animals are allowed.